Showing posts with label paint. Show all posts

Tuesday, November 23, 2010

Shiney Surroundings

My girlfriend Alisha has been asking for my input while designing her husband's office. She has great taste, so she only requires a little guidance from GEORGE. BUT when I see her this week I am going to pressure advise her to lacquer the walls. I think it could make all the difference to his wee study, and in only the best way!

Don't you love when you have a friend who you can design one of your dream-rooms through?!


Sunday, November 14, 2010

Custom Baby!

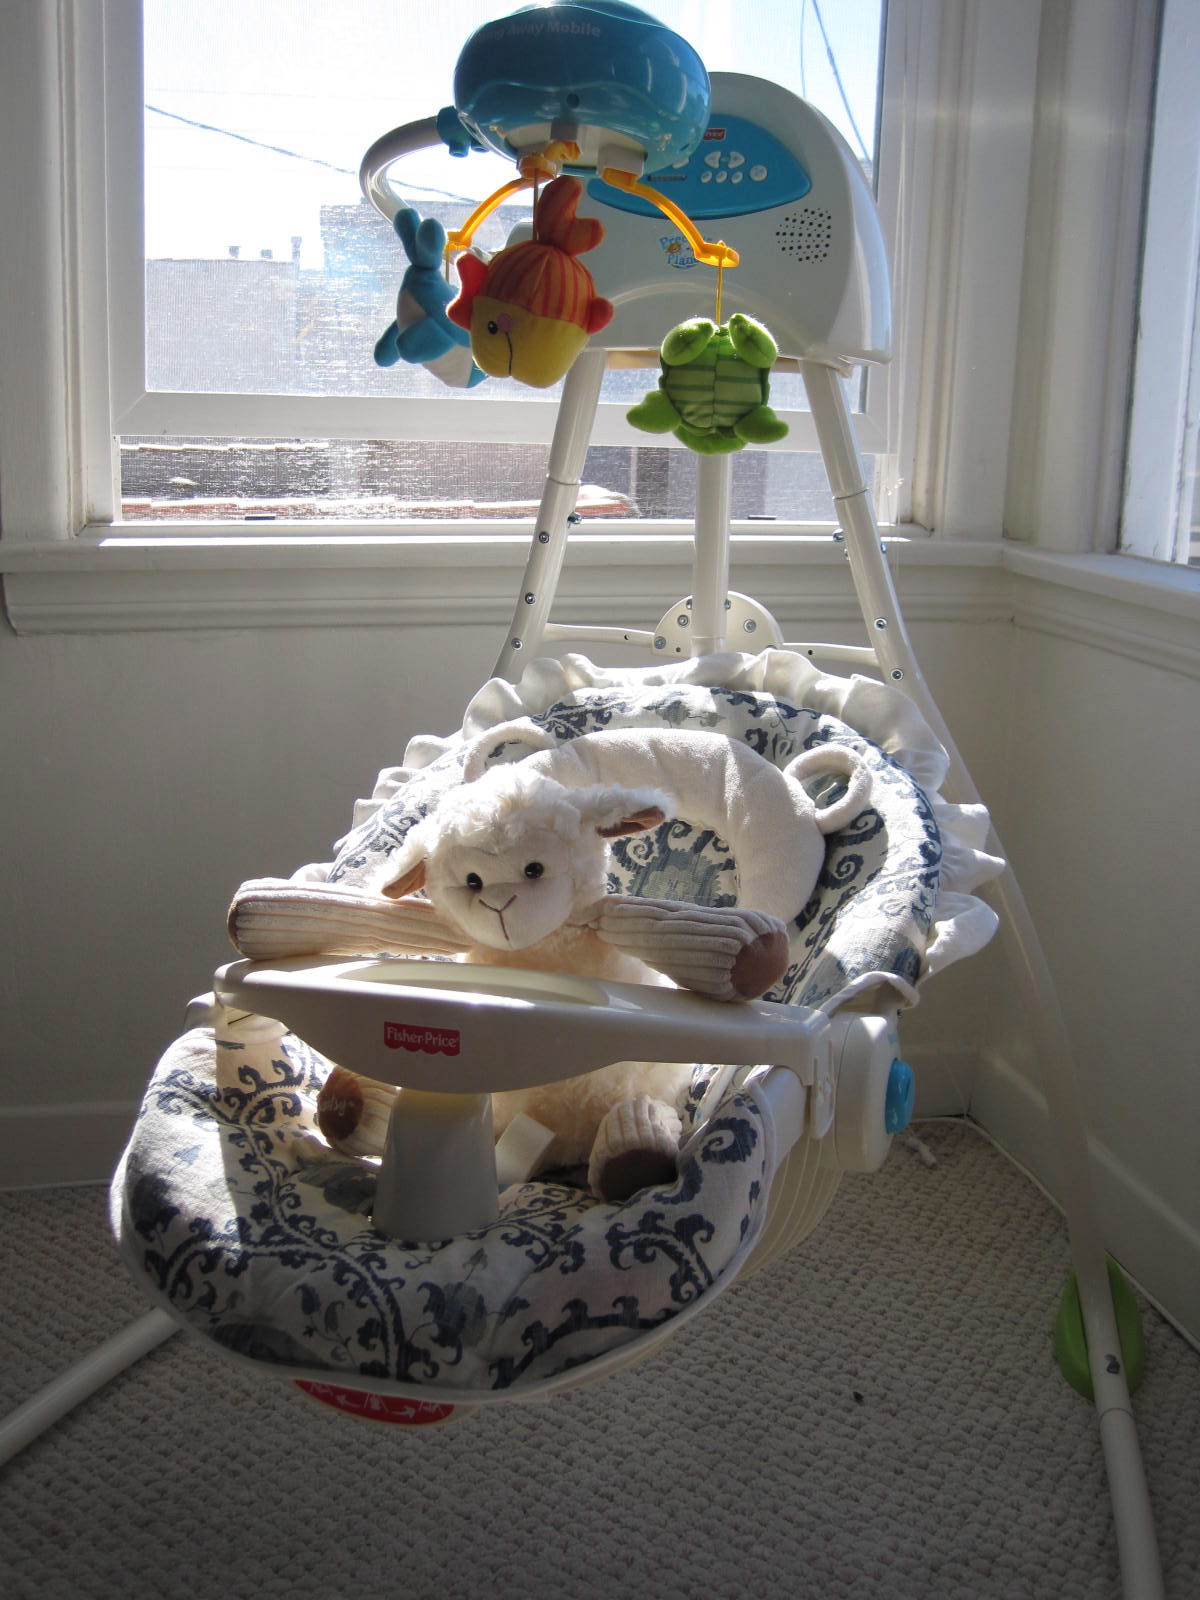
Anyone who has watched their home transform from a nice, clean, adult living space to an overwhelming playground for BABY will appreciate this... custom swing and bouncy chair covers!!!


After inheriting a gently used swing and bouncy chair from a friend, I decided to give them new life and make them coordinate with my apartment decor at the same time... I used the existing covers as the templates and just sewed my cute fabrics right over them.


The bouncy chair required one extra step, sanding and spraying the red frame the same antique white found in the rest of the "nursette."


And after a few hours of drying, here is the bamboo bouncy chair, anxiously awaiting the arrival of Baby M in just 4 short weeks!!!


If you are interested in making custom baby covers, don't hesitate to contact me for pricing/lead times! (emily@georgeinteriordesign.com)


Tuesday, September 7, 2010

Stool for a Steal

I needed a new stool to sit beside my daughter's glider and remembered reading about an inexpensive garden stool facelift on Southern Exposure (one of my favorite blogs!). After reading about Big Lots selling stools for $20, I decided it was time to check that place out. I had never been in before, and have to say, there are some treasures to be uncovered in there!

I wanted to go with a colorful stool for my daughter's room, and this is what I now have...

...but it didn't always look so pretty 'n' pink - although, that's where the steal of the century comes in! The stools were on clearance for $10 but the catch was they were bright blue and all had minor scratches. No problem! I already knew I'd likely want to customize the color. I lugged my in-need-of-love stool to the cash register and was shocked when it was...


...$5.44! What!?! If you want a garden stool, RUN to Big Lots pronto!

Next I stopped at Home Depot and picked up some Rust-Oleum berry pink glossy spray paint and got to work! (ps. there are so many fun spray paint colors out there - I was really impressed!)


One can of paint covered well, but the stool needed a light sanding with 320 grit sand paper and was definitely NOT glossy enough for my liking...

I ran out and picked up a can of Valspar's Hi-gloss lacquer and after one good coat the stool was looking sleek and shiny, just like I wanted! I totally recommend this product - it covered really well and dried perfectly smooth (and they specifically mention it is safe for all households as it's non-toxic once dry).


This stool was definitely meant to be pink! 

Tuesday, July 27, 2010

A Rainbow of Inspiration


Did you know about this? I'm very excited! 

I know there are some Sarah Richardson fans out there! Those of you who are with me, will probably be excited to hear that Sarah Richardson has teamed with Para Paints to create her own paint palette with 75 gorgeous colors. From the quick glances I've taken, I'm liking them. They totally remind me of her signature muted or toned (colors with grey added, a little color theory 101 for you!) color schemes, which suits me just fine! I've already referred to these choices for my family cottage and have to say that it is pretty nice feeling like a trust-worthy, "bestfriend" has laid out some fail proof go-tos for me. :)

Here are some of the paint colors used in Sarah's home...


And feast your eyes on the full collection...I'm particularly loving a bunch of the greys!


Unfortunately for most of us, these are currently only available in Canadian Lowe's stores. Hopefully they make it south soon!

*********************************************************

Color Theory 101...

1. Adding white to a color, or paint, is called tinting...


2. Adding grey is called toning...


3. Adding black is called shading...


Hope you're all having a great week!

Tuesday, April 20, 2010

Projects On-The-Go

I've got two DIY projects waiting for me in my storage unit. I can't wait to get my hands on these!

I've been wanting to swap out our current, college-esque TV stand and last month I found a cabinet PERFECT for hiding our TV. It has doors to conceal the ugly flatscreen, not to mention a shelf that holds the receivers up high where my baby can't reach the DVD eject button (Open, close. Open, close.) Due to our non-existant budget, I searched Craigslist to find it...


We bought this unused, Pier 1 Imports cabinet for $80! I know it isn't the best quality around, but I think it was a pretty good deal...


We have a rug with a mix of persimmon, gold and blue-grey so I'm planning to paint it a high-gloss color something similar to this...


And these are the pulls I'm ordering. I like how they work with the gold nail head detail of my new sofa, but have a hint of black too...
After envisioning my new cabinet, I stumbled on this photo in Lonny. I'm liking the combo!


* * *

I also found some crazy mirrors at a garage sale. This pair was only $20, which is an amazing deal for mirrors! I really love the shape and think they will be great behind our bedside tables...


{Don't mind me in my yoga attire...}


As of now, the plan is paint them blue-grey in a flat finish...

Stay tuned for results! I always get worried about my painting technique and concealing brushstrokes - wish me luck!

Wednesday, September 16, 2009

It's Just Paint!

It's easy to paint moulding white, but consider the statement you could make by simply painting it out in a color - keep it subtle or be dramatic. Don't worry, it's just paint!

You don't have to paint your moulding a high contrast or flashy color in order to draw attention to its detail. Create a subtle look by painting your moulding the same color as your walls...

You can also achieve a soft look by choosing a shade slightly darker or lighter than your wall color...


If you're feeling more dramatic, go high contrast. Classic black and white is a great scheme, and black moulding looks fabulous!


Not sure about black, why not ease into it? We love how one portion of this moulding has been painted, creating a thin, interesting stripe.


Don't be afraid to try any of these options in just one room of your house. The two images below are adjacent rooms and demonstrate nicely how you can mix different looks successfully...


Lastly, take color outside and freshen up the look of an exterior facade...


Linked Within

Related Posts with Thumbnails